Setup
We’ll use the Perform cli to scaffold an application for us.
Create a new directory and start a new project by running the perform new command:
perform new hipster-bikes
This will create the directory hipster-bikes and create a brand new Perform application inside.
The cli will ask you some questions during setup:
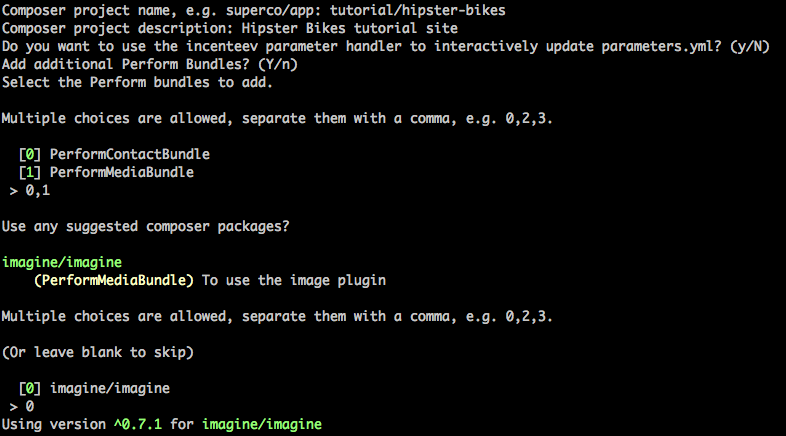
Composer project info: the name and description of your application to go in composer.json.
We’ll use the name tutorial/hipster-bikes, but feel free to pick any name.
Incenteev parameters: Perform tries to be as lean as possible out of the box, so will remove incenteev/composer-parameter-handler if you don’t require it.
Answering no means you’ll have to manage app/parameters.yml by hand.
We’ll choose no for this tutorial.
Additional bundles: any additional Perform bundles to include in this application.
Pick the PerformMediaBundle and PerformContactBundle from the options.
Optional composer packages: the bundles we added can suggest optional composer packages for richer functionality.
Pick imagine/imagine so we can use images in the media library.
Creating a new bundle: we need to create a bundle for our application code.
Choose the AppBundle option, which simplifies things slightly.
Note
perform new simply wraps composer create-project and commands from the PerformDevBundle in a single, easy to use command.
Configure a web server
Set up a web server and database for the app to use.
There are many options, but for the sake of this tutorial we will use PHP’s built in server and sqlite, which requires no additional setup.
Note
You could also setup Nginx or Apache, and a database using MySQL or PostgreSQL. These could run directly on your machine, a vagrant box, or even some docker containers.
See the symfony docs for more information.
Configure parameters
Configure doctrine to connect to your database in app/config/parameters.yml.
Since we’re using sqlite in this tutorial, we can ignore that and simply update doctrine configuration in app/config/config.yml:
doctrine:
    dbal:
        driver: pdo_sqlite
        path: '%kernel.root_dir%/sqlite.db'
        charset: UTF8
Create database schema
Create the database you specified in the last step (a sqlite database will be created automatically).
Then update the database schema:
./bin/console doctrine:schema:update --force --dump-sql
Note
In a production setting you’ll want to use migrations instead of the schema creation tool to avoid data loss.
Create a user account
Run the perform:user:create command to create a new user.
./bin/console perform:user:create
Enter a name, email, and password.
Login to the default dashboard
Start your configured webserver. We’ll use the built-in server command:
./bin/console server:run

# [OK] Server running on http://127.0.0.1:8000
Head to http://127.0.0.1:8000/admin. You’ll see a login page; enter the email address and password you gave in the previous step.
Congratulations! We’ve created and configured a brand new Symfony application using the Perform bundles we require, and have an admin area ready to customise.